Learn how to add and use Pins
Overview
Pins is where all of your fire stopping points are added, whether this be for a survey or for installation. Information like products, defect type, fire rating etc are recorded in this section. This will feed into reports to give your customer a information rich report with all the selected relevant data you decide to show.
How pins are used
Pins are the primary area of the system, pins record all the relevant data for that fire stopping point including pricing, fire rating, pin location on a drawing etc. Each pin can have multiple pin histories, think of pin histories as work logs that have a status associated with each history. The pin inherits the status from the most recent history, allowing you to add a new history to a pin setting it to the Installed status. When generating a report for the client, the before and after photos from the two pin histories will be displayed in the report. For more details on Site Reports, click here.
Adding a pin
Pins can be added either from the desktop system or the mobile app. To see how to add & manage pins through the mobile app, please follow this link to learn more.

To add a pin, follow these steps:
- Navigate to the Drawing page of your choice from within a site.
- Click the Add Pin button.
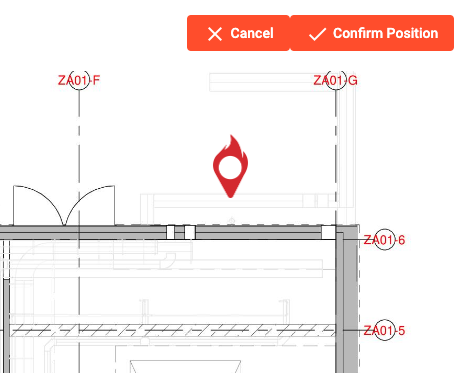
- Click where you want the pin on the Drawing.
- Once the pin appears at your selected location, click the Confirm Position button.
In the form, enter the pin details

- When adding products you may be required to fill out the required dimensions.
- Click Save.
Your pin is now created along with its first pin history.
Adding a pin history
Pin histories can be added either from the desktop system or the mobile app.and

To add a pin history, follow these steps:
- Navigate to the Pin page of your choice from within a drawing.
- Click the Add Pin History button.
- Click where you want the pin on the Drawing.
Just like creating a pin, you fill out the relevant information.

- Click Save.
Your pin history is now created, your pin will now be showing two pin histories.
to
Editing pins
To update a pins location follow these steps

- Navigate that to the chosen pin
- Click Edit Pin Location in the top right corner of the pin screen.
- Click Edit Pin Location at the bottom left of the popup screen.
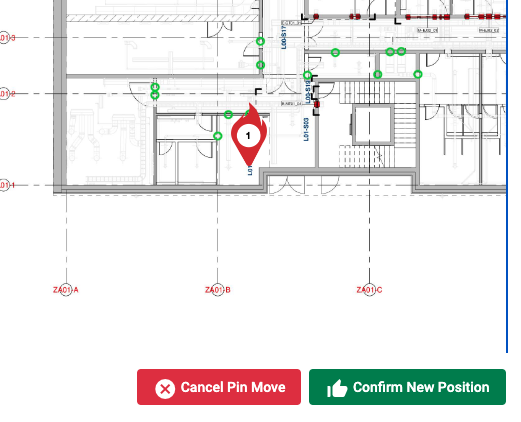
- Select on the drawing where you would like the new pin location to be.
- Click Confirm New Position.
Deleting a pin
To remove a pin, click Delete Pin in the top right corner of the pin page.
Please note that the delete option should only be used for pins that were added by accident. Please use the pin histories to change the status of a pin if no work is required.

By following these steps, you can create and manage pins and histories in Fire Survey Pro. This will ensure your surveys and reports have accurate, relevant data.